
How it works
Student guide
Every step on the site, from creating your account to your first practice exam, in order and with screenshots.
Step 1
Create your account
There is no separate sign up form and no password. Your account opens with a one time code sent to your email address.
- Click Sign in / Sign up at the top of the site.
- Type your email address and click Send code.
- A 6 digit code arrives in your inbox. Type it and click Continue.
- If this is your first sign in, type your full name and click Create my account. Your student panel opens.
- Campaign and announcement emails are optional. Your account opens even if you leave the box unticked.
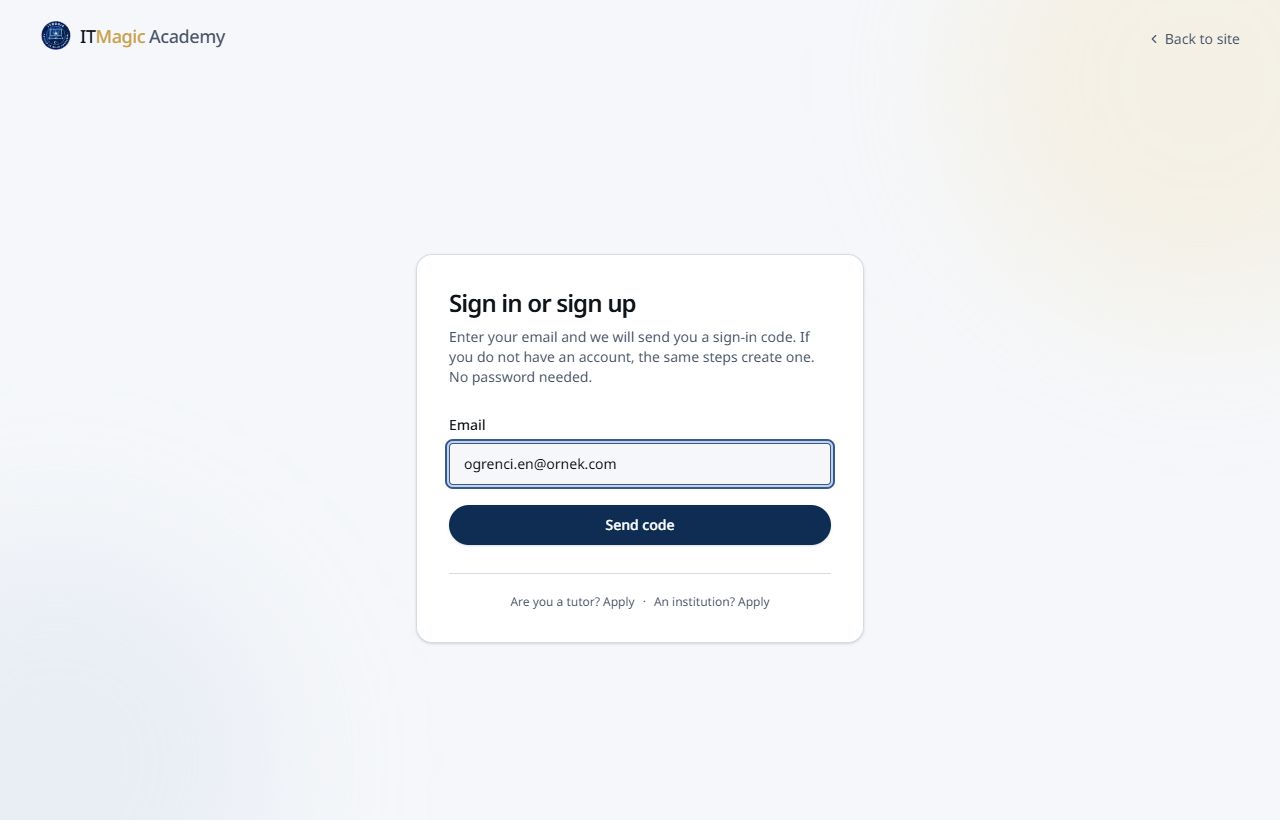
Sign in screen: type your email address 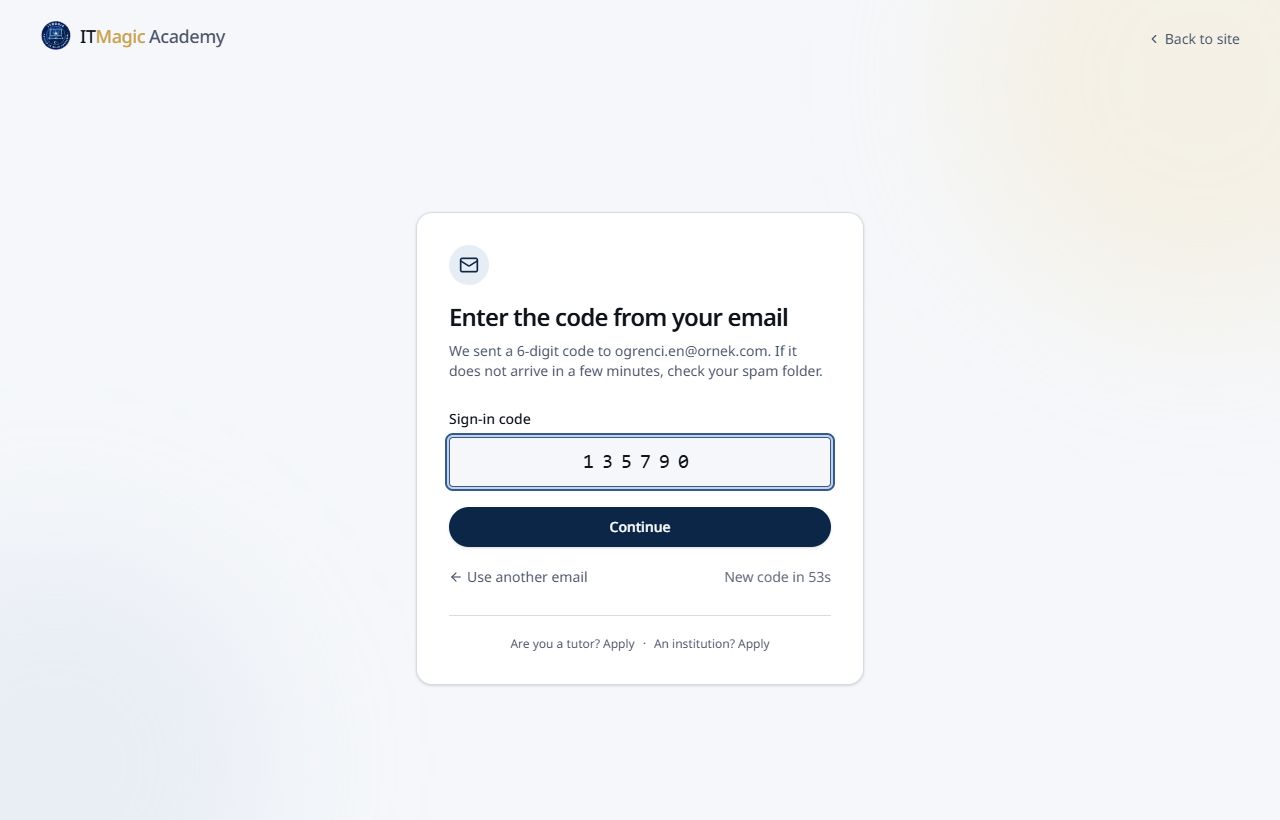
Type the 6 digit code from your inbox 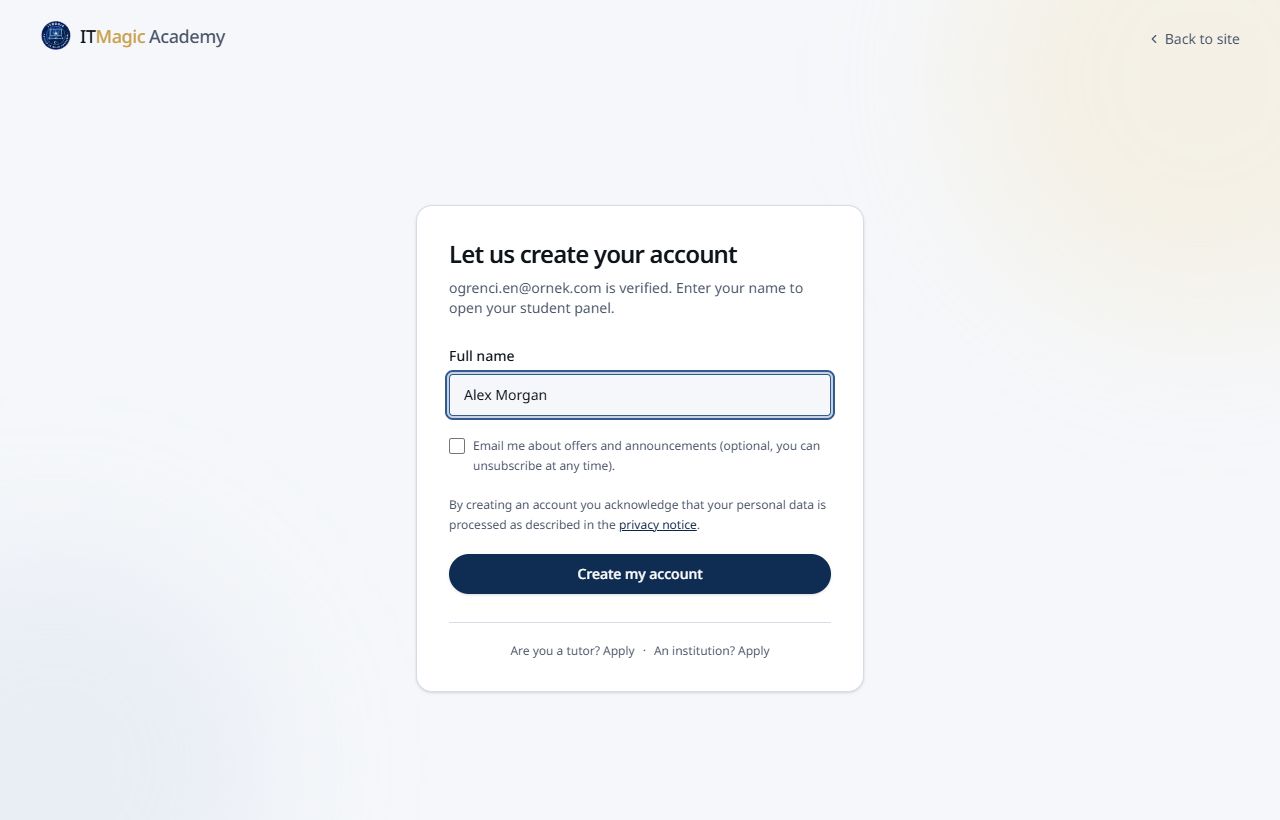
On your first sign in, type your name and create the account Step 2
Signing in later
You use the same screen every time: type your email and enter the new code you receive. There is no password to remember.
- A code is valid for 20 minutes and works only once.
- If the code does not arrive, check your spam folder. After a minute the Resend code button becomes available.
- If you typed the wrong address, go back with Use another email.
- On a shared computer, use Sign Out at the bottom of the menu when you finish.
Step 3
Choose your exam
The first time you open Lessons in your panel, you are asked which exam you are preparing for. The lessons of that exam are listed.
- Pick your exam and click Choose this exam.
- If you chose AP or IB, you also tick the subjects you take.
- You can change your choice at any time.
- Once you are a member, the screen follows the exam in your membership automatically.
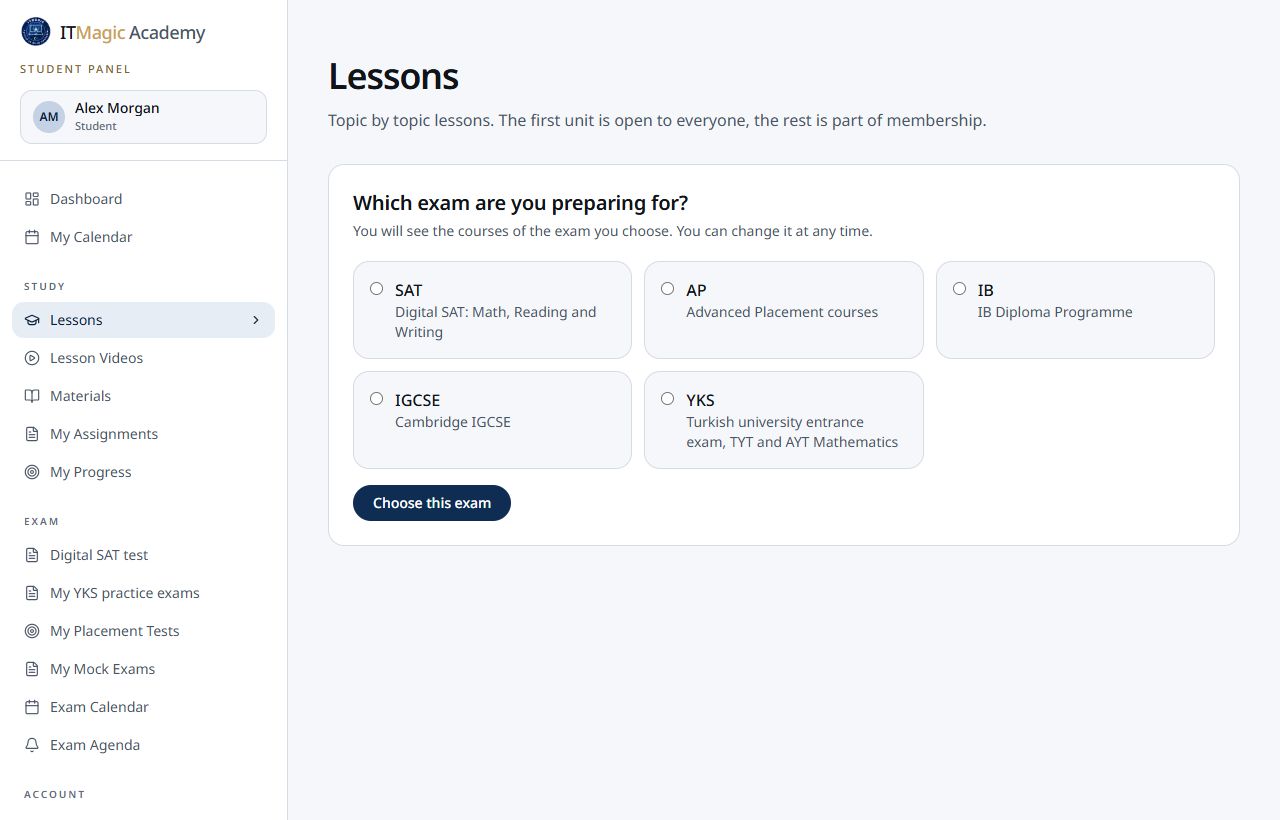
Choosing an exam on the Lessons screen Step 4
Study with the lessons
Each subject is organised into units. Every topic has an explanation and a quiz.
- With a free account, the first unit of every subject is open.
- You can open a few topics from locked units with trial credits. A topic you open stays open.
- The free plan has a daily limit on new topics. You can go back to the topics you opened today as often as you like.
- Membership opens every topic of your exam.
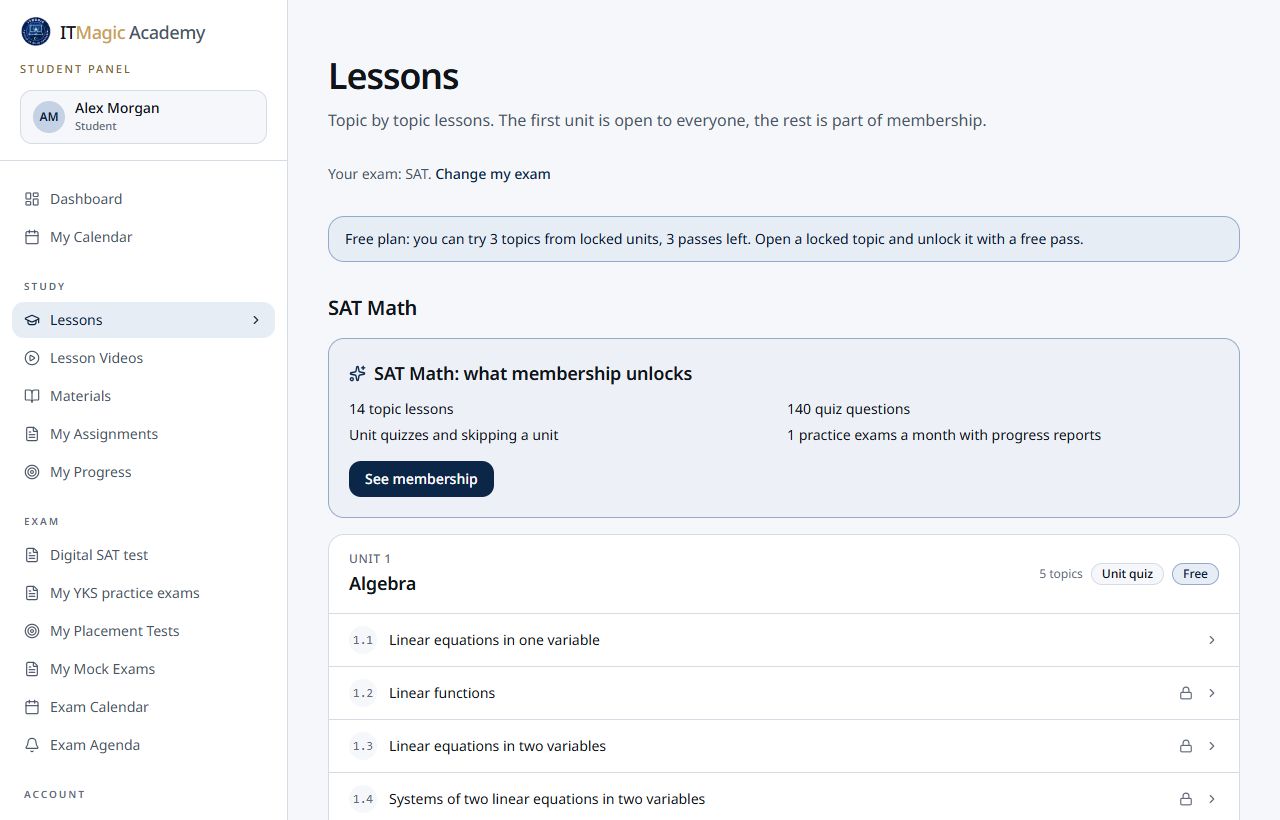
Lessons screen: open and locked units Step 5
Take a placement test
In My Placement Tests you can choose a test that fits your exam. The test is adaptive: the difficulty of the next question depends on your answers.
- The test is free and saved to your account.
- When you finish, a report shows your strong and weak topics.
- A placement test you took on the site before creating an account is linked to your account when you sign in.
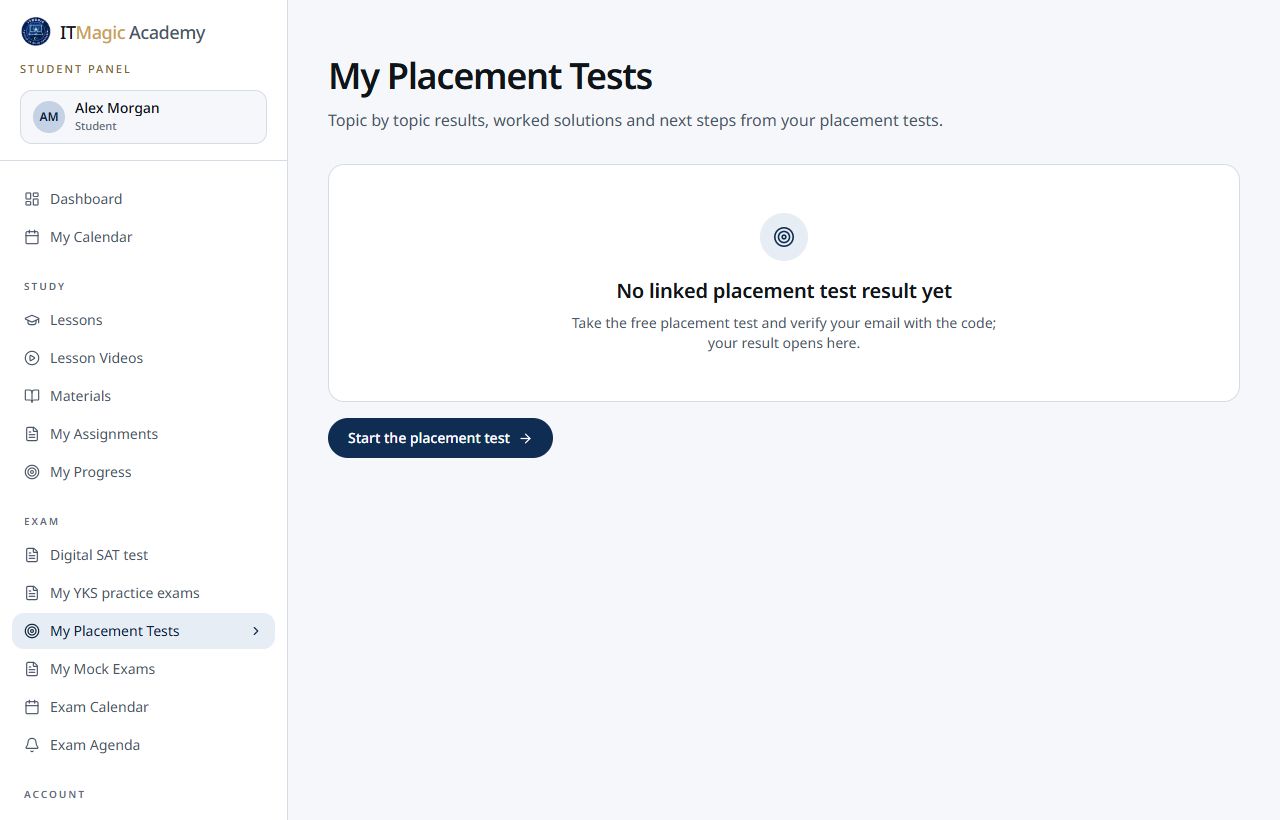
My Placement Tests screen Step 6
Become a member
Membership options are on the Pricing page. Payment is made by bank transfer, the site never asks for card details.
- Click Join on the Membership card, or Contact us on a mentoring card. Both open WhatsApp with a ready message.
- Our team sends you the bank details and the amount.
- Once the transfer arrives, your membership is activated and all content opens in your account.
- Membership runs in periods. To renew near the end, just write to us on WhatsApp again.
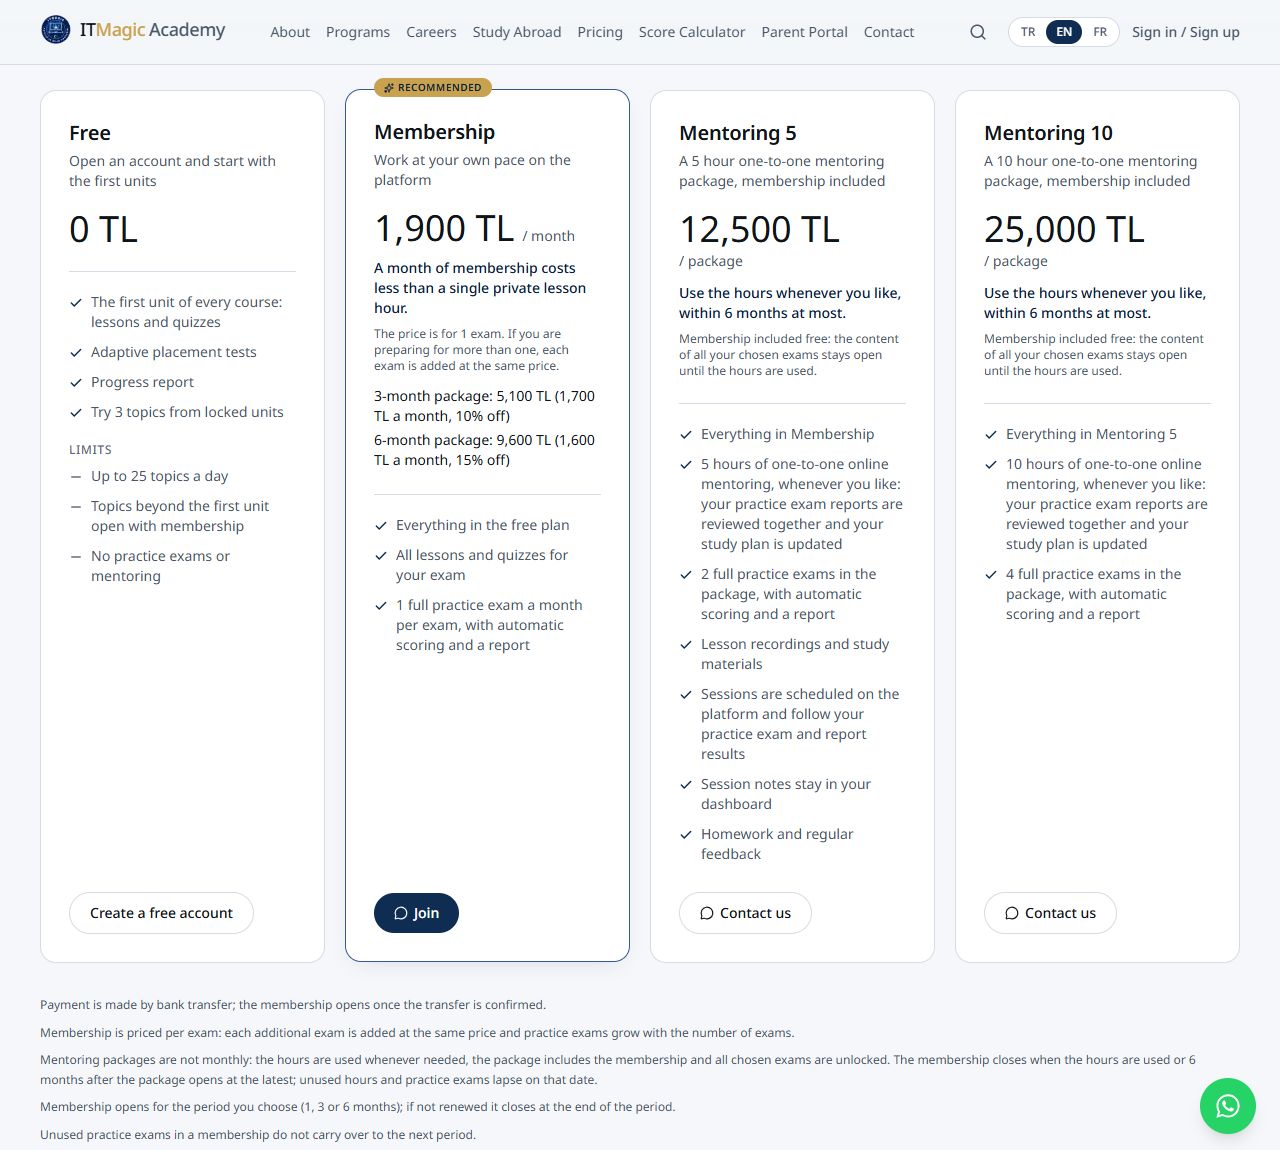
Membership cards on the Pricing page Step 7
Get to know your dashboard
The Dashboard is the first screen after you sign in. It summarises your next lesson, pending assignments, exams and membership.
- The Your membership card shows the end date, the practice exams left this period and the mentoring hours left.
- The Next 7 days section lists your planned lessons.
- Use the menu on the left to reach every section. On a phone, open the menu with the button at the top right.
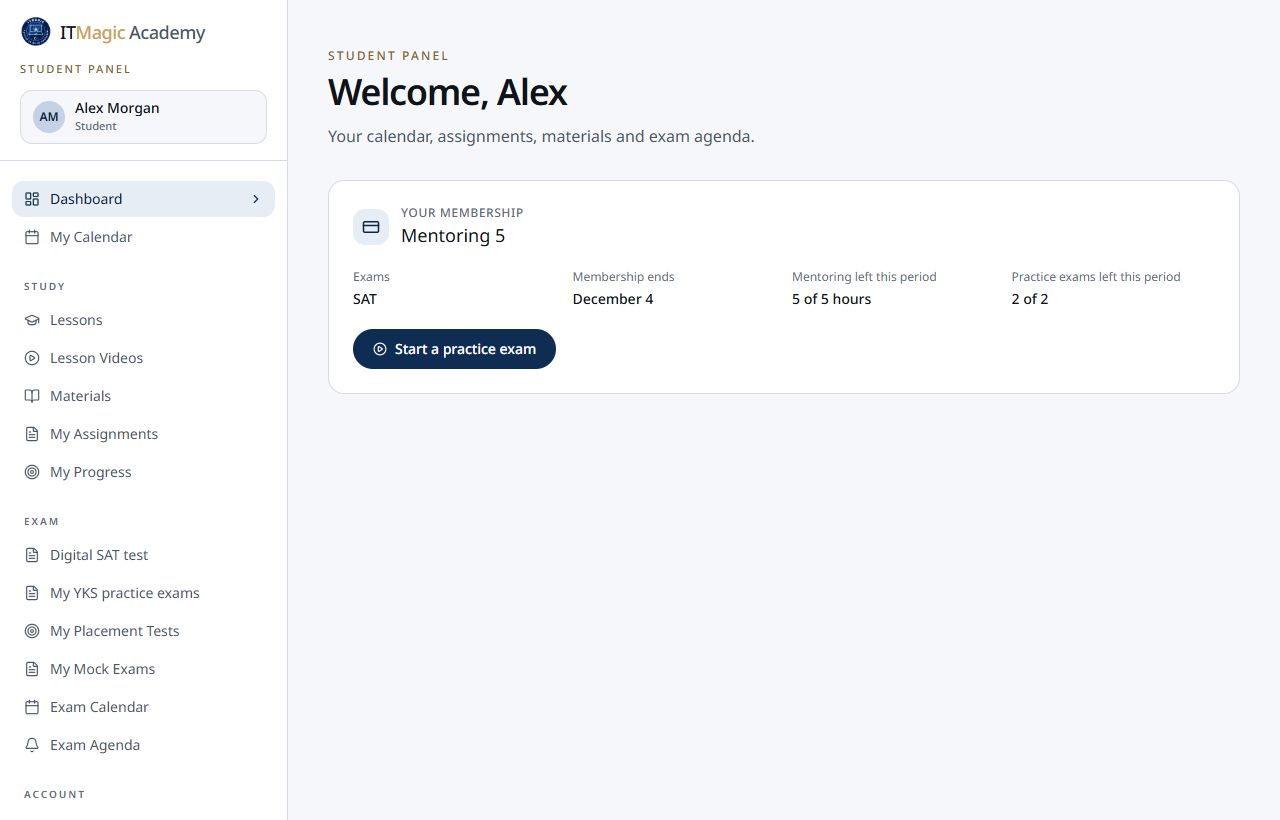
Student dashboard Step 8
Take practice exams
Membership gives you practice exams every month. They run with the real exam timing, and your score and report are prepared automatically.
- Start a Digital SAT practice exam with Start a practice exam on your dashboard.
- The report of a finished exam stays in its section, so you can review it at any time.
- Paper mock exams set by your tutor are listed in My Mock Exams.
Step 9
Mentoring and lessons
Mentoring packages include one to one online sessions. Sessions and lessons run through the panel.
- My Calendar shows your planned lessons and exams. When it is time, join with Join lesson.
- Lesson Videos holds the recordings of your lessons, Materials holds the files your tutor uploads.
- My Assignments shows active and past assignments, My Progress shows practice exam scores and goal tracking.
- Attendance shows the lessons you attended, My Certificates shows the certificates you earned.
- Exam Calendar and Exam Agenda keep the dates of your target exam and a countdown.
Step 10
Having a problem?
Write to us whenever you get stuck. These are the most common cases:
- The code does not arrive: check the address, look in your spam folder and request a new code after a minute.
- The code is wrong or expired: request a new code and use the latest one in your inbox.
- I paid but the content did not open: it opens once the transfer is confirmed. If it takes long, write to us on WhatsApp.
- If your account appears closed, contact us through the contact page to reopen it.
Your question is not here?
Write to our team, tell us where you got stuck and we will sort it out together.